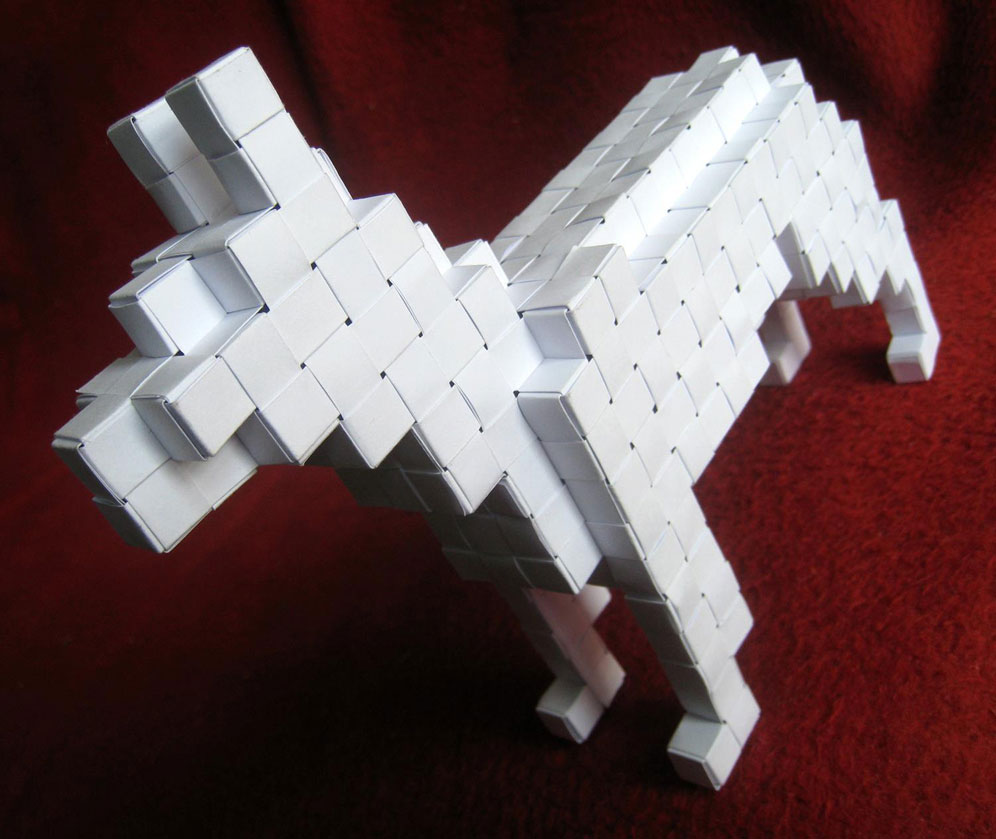
Lee-Kuo saw his mum’s paper dogs and decided to design his own system for paper weaving a dog. He found pictures of a dog on the internet and created the proportions in 3D. He then began weaving using his 3D model as a guide. This is his finished paper woven dog.
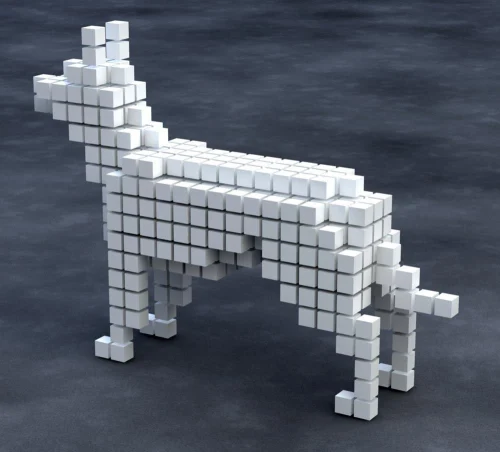
rear view of the 3D model
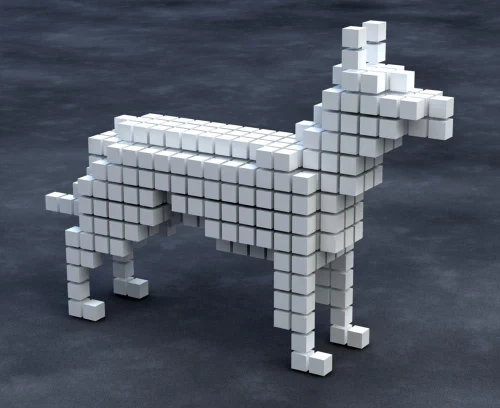
front view of the 3D design

wonderful head proportions
wonderful weaving system
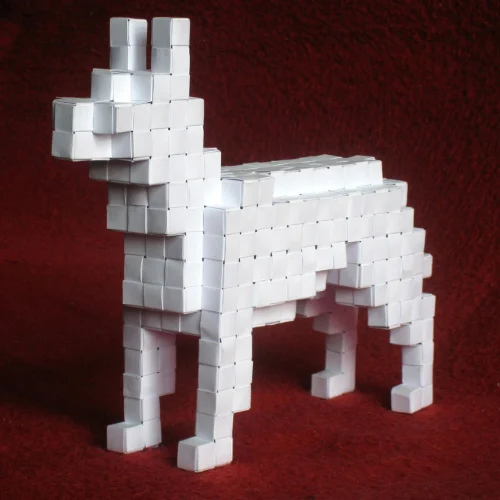
simply a work of art
Posted in paper | Tagged 3d, dog, paper, paper models, weaving | 3 Comments »
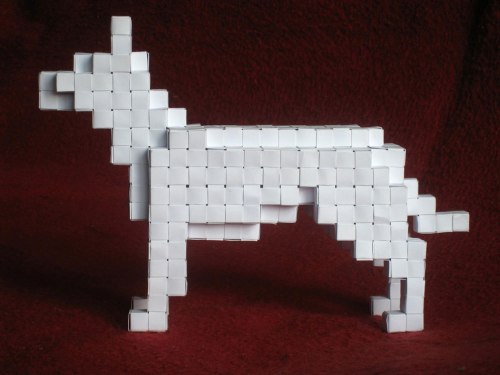
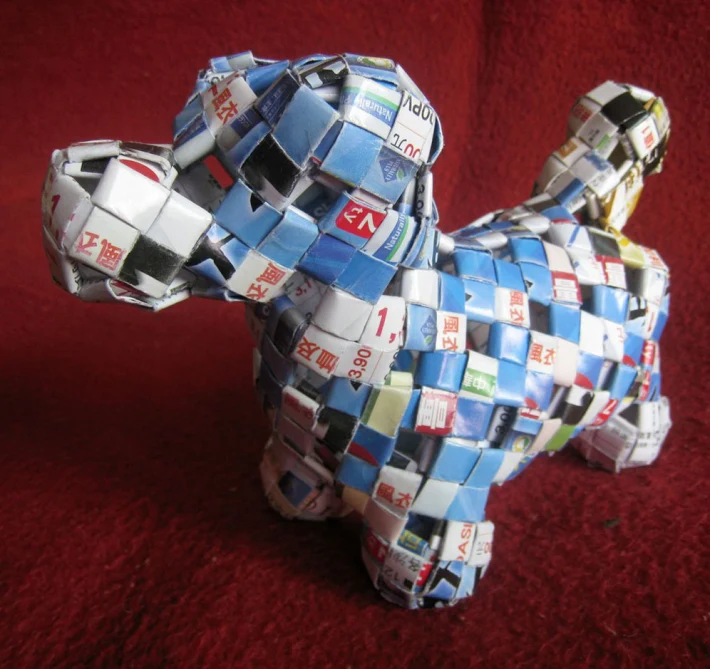
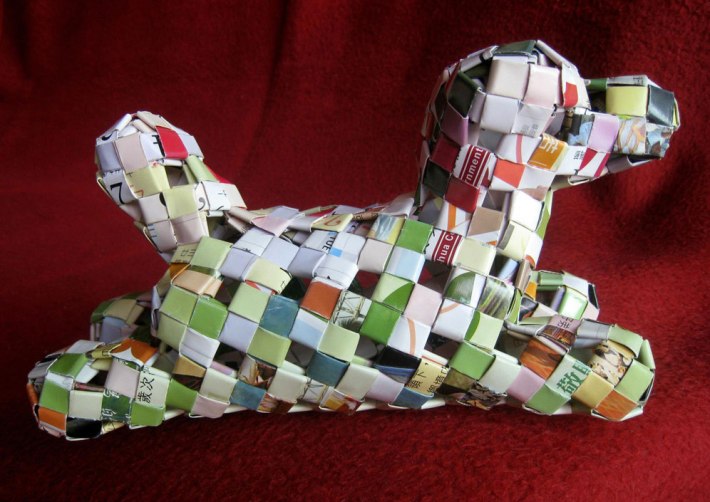
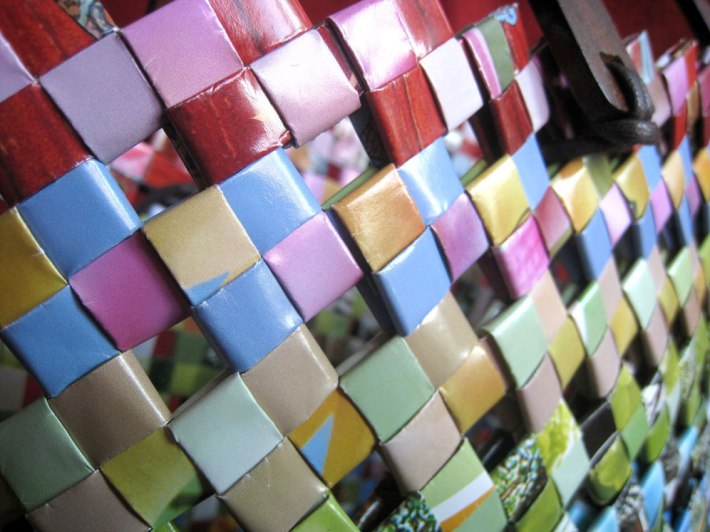
We had a few magazines lying around and my wife decided to have a go at paper weaving. These are the results and I think they are really amazing. The handbag gets lots of attention and many people would like to buy one. The dogs are also really incredible, which shows that this system of weaving lends itself to almost any shape.
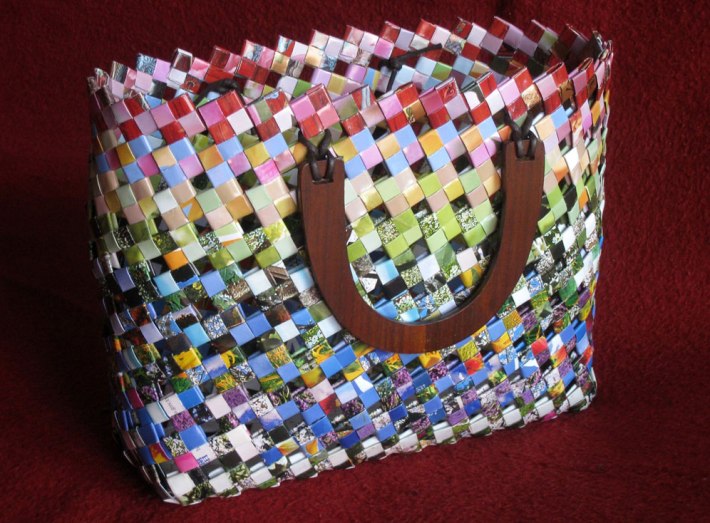
a beautiful paper handbag
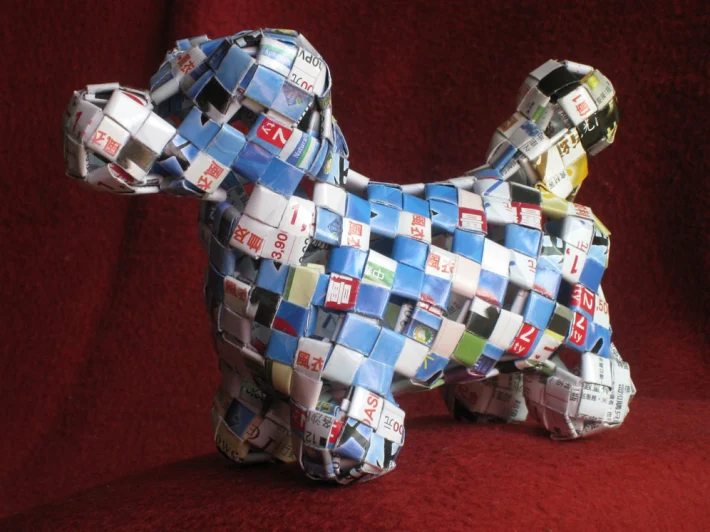
a lovely paper dog
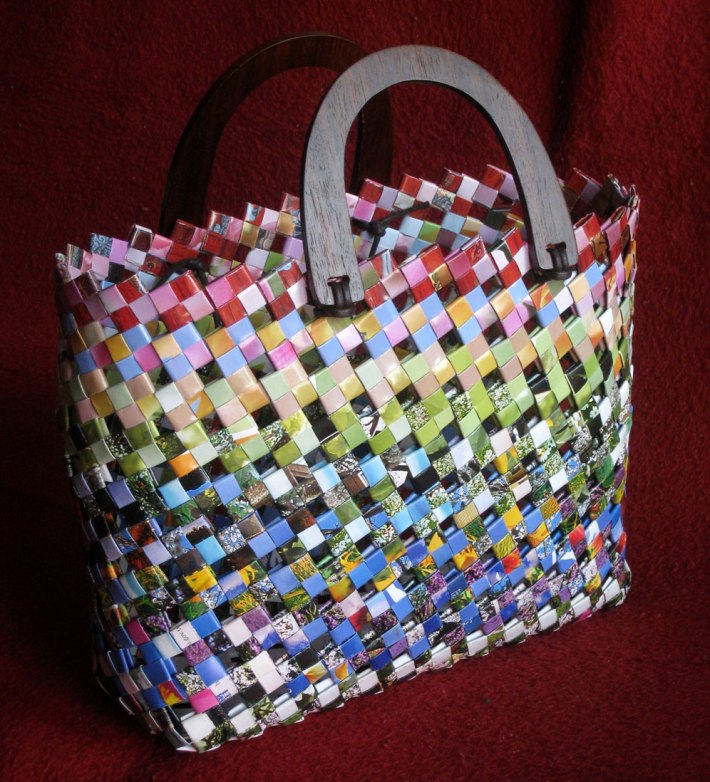
very practical and simply functional

wonderful proportions
paper is so strong
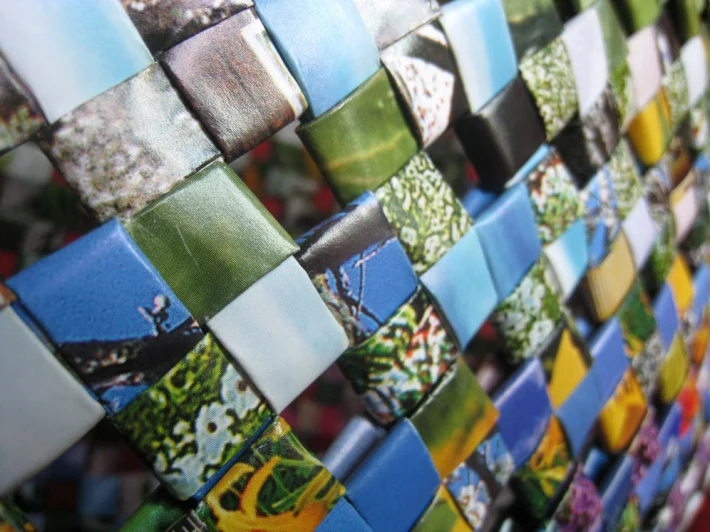
great patterns
so cute
lovely strong weave
Posted in general, paper | Tagged basket, dog, handbag, magazines, paper, recycle, recycling, weaving | 1 Comment »
This was one of those spontaneous projects that simply went straight into action. Lee-Kuo used his 3D skills and completely designed the instrument in Cinema 4D using a grid system for the tuned length. After he had completed the model we decided to build it. It’s a slow process but we are making great progress. You can watch a stop animation of this instrument on my YouTube channel, Lee-Kuo created the animation and music for the video. I will update this post when we complete the instrument. Watch the animation here Instructions here

view from the front ( 3D rendering )

view from the rear ( 3D rendering )

in the process of building
Posted in general, wood | Tagged Cinema 4d, design, Lee-Kuo, pipe instrument, PVC, stop animation | 15 Comments »
I designed this small lamp for my summer camp students who built the 8 watt stereo amplifier. Before they attempted to solder all the components for the amp i let them solder the switch and light fitting. They had no idea i had made these lamps for them so i hope they enjoy the lovely warm glow. The sizes of popsicle sticks used are 11.5 cm and 6 cm. The base was a 5mm thick piece of board that i had lying around, inside the lamp are matchsticks which stop the lamp from falling over the base. The bulb is 7 watt and produces a lovely warm light.

A super mini cube lamp

The wooden base

the underside showing the 6 cm feet

simply beautiful

paper texture and simple design
Posted in electronic, paper, wood | Tagged 7 watt, mini, popsicle lamp, summer camp | 3 Comments »
It’s been a long time since my last post but i hope the wait was worth it. This project was a design that came to me for a high school student. My student wanted to make this to take to college, so i designed it for easy construction, cheapness and great design. I also had four high school students make one each during summer camp, they were so happy to take it home. The whole thing is based around a super cheap 8 watt stereo amplifier and an empty CD container used for the speaker stands. It looks and sounds fantastic.

all lit up

two finished amplifiers

gold plated inputs

the power section

banana plug speaker terminals and power socket for speaker LED’s

connections to the amplifier

the wiring from the housing to the amp

a lovely blue light by night

CD container speaker stand

a wonderful way to listen to music
Posted in electronic, wood | Tagged 12V, 8 Watt amplifier, CD container, LED, loudspeakers, popsicle sticks, speaker stand | 3 Comments »
I have always wanted to make this string ball lamp and decided to have a go on a sunny afternoon on our balcony. I mixed the PVA glue with water and began wrapping the balloon, glue went everywhere and it took about 1 hour to complete. I made the basic popsicle stand and fitted it with a standard light fitting. It looks great in our study room.

Lee-Kuo calls it a tree lamp

close-up showing the bulb inside

the supports for the string ball

all lit up
Posted in electronic, wood, wool | Tagged ball, balloon, lamp, popsicle sticks, string | 5 Comments »
This lamp was designed for my students, I thought I would give them an electrical project to build. It truly is very simple with just a few popsicle sticks and a piece of paper. Most of the work was making the electrical cable with a switch. The cube lamp in the pictures is my own personal version, the students made a normal flat standing cube.

the cube standing on it's corner

a wonderful ambient light

everything is made from wood
Posted in electronic, paper, wood | Tagged cube, popsicle lamp, popsicle sticks | 4 Comments »
This is something I always wanted to do with students. I have drawn parabolic designs since I was young and always wanted to create them with cotton and felt. Having a small group of home schoolers was a great opportunity to make this craft, it needed approximately 100 nails for each board which they hammered with great delight. The finished crafts were great and they were really pleased.

Lee-Kuo's 2 colour 10 pointed star design

another beautiful star design in white

a circular design in the making

a great 5 pointed star

a free form design with 400 nails
Posted in wood, wool | Tagged circle, cotton, design, felt, lines, nails, parabolic, star, thread | 1 Comment »
This is a fantastic popsicle chest of drawers made in Taiwan as a kit. The examples here are my own cutting and sanding which I built with a student over a period of 2 semesters. It truly is a lot of work and many hours of gluing and sanding. My student was so thrilled when she finished it.

A very happy student with her finished chest of drawers

The proud teacher with his chest of drawers

the popsicle chest of drawers and the chair which fits underneath

red felt makes a lovely finishing touch
Posted in wood | Tagged boxes, chest of drawers, mirror, popsicle sticks | 8 Comments »
This craft came about because one of my students made a balloon paper măché shade in an art class. She made it so well I thought I would design a lamp stand for her, and this is what I came up with. We both made a lamp stand from popsicle sticks and I made the electrical fittings for a 15W bulb. When she switched it on she was amazed at her work. The pictures here are my lamp shade I made, I painted it yellow and red for a lovely warm glow. My wife did a waldorf colour scheme.

a quick and simple lamp for students to make

the complete popsicle stick stand

a very simple construction for the stand

this lamp shade was made by my wife
Posted in electronic, paper, wood | Tagged balloon, paper măché, popsicle lamp, popsicle sticks | 3 Comments »
Older Posts »